Friday, October 31, 2014

Hard Reset a Blackberry Storm 9500

Hard
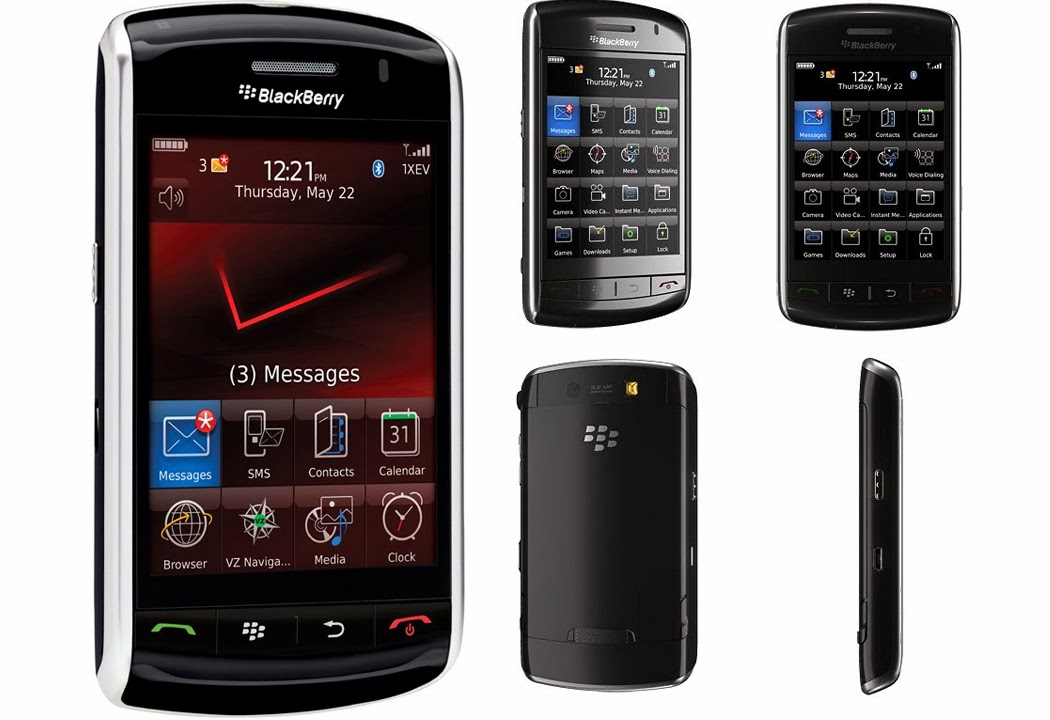
To perform a master reset or hard reset on your BlackBerry 9500 hard reset or 9530 Storm hard reset series you will need to:

Options >Security Options > General Settings > click menu and choose wipe handheld.

Hope useful.
Read More..

Thursday, October 30, 2014

How to Hard Reset Galaxy Nexus

What if your phone Galaxy Nexus is locked and you forgot the password or the phone becomes very slow in response because the phone memory becomes full or some apps causes the problem? The best thing you can do is to make a full hard factory reset .

Just what is a hard reset? Well , its a simple process using the device buttons that restore your phone back to its default factory settings. It gets rid of all information, applications as well as all media files installed .  Be sure to back up all data and information stored on the phone before doing this.

Below is the procedure on how to hard reset Galaxy Nexus .

1.  Turn off the phone or simply pull the battery out and insert it back again.
2.  Hold Volume down and up button + Power On button until reset menu appears.
3.  Select Recovery Mode by using the volume keys to move through the available options.
4.  Press Power On button to select. The device will restart in Recovery mode.
5.  When robot appear + exclamation point hold again Volume Up and Down button + power On button
6.  Select wipe data/factory reset.
7.  Select Yes -- delete all user data.
8.  Select reboot system now.
Read More..

Wednesday, October 29, 2014

Nokia E52 Bluetooth IC Not working problem solution

Nokia E52 Bluetooth is not working problem can be solve with its Bluetooth IC that is controlling the data transfer function in Nokia E52. If we can not connect Bluetooth of Nokia E52 it means we are not able to transfer data via Bluetooth in it.

The above repairing diagram will help you to find out parts that are used in Bluetooth function.So find them and clean these parts with electronics cleaner.So that if there is some rust or carbon that can be clean.Apply hot air to dry it and do not apply much because it can be harm for your skin.
Resold these parts and re flow them can solve Bluetooth problem in Nokia E52. If it can not solve the issue then replace them to solve Bluetooth problem in the Nokia Mobile phone.
for more detail and new tips and tricks about cellphone service problem keep visiting this page we will update cellphone service diagrams timely with new cellphone diagrams.some related post are also given bellow you can read them also for more information about cellphone.
Read More..

Nokia 2330 Classic Local Test Mode Problem Solution

Nokia 2330 Classic. You can solve this problem by following a few simple steps as given in this post.Lock at the diagram bellow that will help you to solve Test Mode Local mode problem in Nokia 2330 Classic.all cellular mobile repairing solution here Nokia Asha 311 Power Button On Off Switch Not Working Problem .
Before removing this part that is identified with red line in above diagram replace battery and if batter can not solve this issue dis assemble mobile phone.
Find parts that are shown in diagram with red lines and remove them to solve Nokia 2330 Classic Test Mod Local Mod.
for more detail and new tips and tricks about cellphone service problem keep visiting this page we will update cellphone service diagrams timely with new cellphone diagrams.some related post are also given bellow you can read them also for more information about cellphone.
Read More..

Nokia X3 Display problem solution Full Display IC Jumper ways Solution

Heres a full display problem solution for Nokia X3, If you ever having tried to replace a new LCD module replacement and updating the firmware by only trying to fix a Display problem, like White screen, Blue screen, blank screen, garbled, saturated and etc on X3. but the display problem still unsolved.Nokia 5030 White screen and Blue, Blank LCD Display solution
This solution below shows the connection of display ESD filter IC to each certain pins of the B2B connector.


Nokia X3 display problem solution
nokia
 Nokia X3 display IC line tracks
If the the Display ESD filter chip is damaged this will result to display problem issues. By replacing them will only possibly solved the problem.
Read More..

Tuesday, October 28, 2014

Nokia Asha 202 MMC Memory card problem solution

Nokia Asha 202 MMC Problem, Nokia Asha 202 Memory Card Solution, Memory Card Not formatted, Memory Card Not detected problem solution in Nokia Asha 202. All these memory card problem solutions are possible by following diagrams that I am going to post in this post.

nokia C5-03 USB not charging Not detect problem solution jumpers

Replace memory card and check it again. If card is not formatted make it format with card settings from Nokia Asha 202 or format the memory card with computer.
After dis assembly of nokia asha 202 check the whole mother borad for water damages or carbon on it. If you find it clean mother board with electronics cleaner and apply hot air to make it dry.

Do not apply much heat it can damage the nokia sha 202 mother board or may can harm your skin also. Check red line Ic that is used for memory card function in Nokia Asha 202. Re sold it and re flow the IC. If resolding of the memory card IC can not solve MMC problem you have to replace thic MMC Ic in nokia asha 202. 
Read More..

Monday, October 27, 2014

Nokia X3 Not charging solution for charger no response problem

Heres a solution for Nokia X3 Not charging problem like it shows no response or indication on the display when a working battery charger is being plug-in.

If encountered charging problem on nokia X3, you may need to check the DC jack or charging pin and ensure that is perfectly cleaned, not misaligned and with properly in-tacked on the PCB contact pads.
If the charging pin assembly is perfectly fine but still it shows no indication of charging operation,
the solution below shows the components on Nokia X3 PCB board that may need to check and or replace if a charging problem occurred.


Nokia X3 Not Charging Problem  Solution
nokia
The solution above shows the components such as chip fuse, diode, filter coil and capacitor which holds as a charging protection circuit. These components will breakdown or being damaged if a short circuit happened on Nokia X3 PCB board. You may need to check and replace these components if found damaged and fix nokia x3 not charging problem.
Read More..

Nokia X3 camera hardware operation failed solution

Here;s the solution for Nokia X3 Camera Operation problem. This solution shows the possible caused that the camera will unable to perform operation due to some open and faulty components on the PCB board.

The solution below shows us where and what particular components we need to check in troubleshooting nokia X3 camera problem. 

Nokia X3 Camera Operation Failed Solution

;nokia
If encountered such camera problem, you may need to check the supply voltages of the camera module first, if this supply voltages is open or cut, just find a way to reconnect the line paths.
Try also to replace or install a new Camera Module.
If these camera supply voltages is not present or cant be read using a multimeter there is a possibility that the Pearl IC is faulty, and also if all the supply voltage line paths and camera module is okay, you may need to rework the pearl IC or replace if necessary.
Read More..

Sunday, October 26, 2014

Nokia X6 No Network Signal Reception problem solution hardware repair Solution

Heres the solution that may help and guide to repair Nokia X6 having a No Network Signal reception. If ever tried to  restore and update the device firmware but nothing happens, this solution shows the corresponding  RF circuit of Nokia X6 PCB board that might something wrong, faulty or being damaged.


Nokia X6 No Network Signal problem solution
nokia
Repair Tips:
1. Apply and supply voltage to the PCB board using desired DC regulated power supply voltage of 3.7 volts. Check the supply voltage from the cellphones battery through to the corresponding components highlighted in red color, these are battery supply voltage filter coils that being feeds to RF circuit components. IF there are no voltage readings on that areas, check the continuity of the battery positive terminal on that certain parts. Apply jumper if the line is cut or open. check also the filter coils and replace if found damaged.
2. Check and measure the secondary voltage output from the RF DC to DC converter chip highlighted in orange color. If there is no voltage readings on that spots, rework or replace the DC to DC converter IC.
3. Check or replace the Clock crystal oscillator. (VCTXO)
4. Rework or replace RF Power Ampilifier IC (PA)
5. Rework or replace Front End Module IC (FEM)
6. Rework or  replace Radio Frequency IC (RF IC)
Read More..

Saturday, October 25, 2014

Nokia 2710n camera hardware failure problem repair solution

This solution shows the camera module circuit of nokia 2710 navigation edition. If the camera failed to initiate, this solution might help fix and repair the problem. If already tried to restore its firmware but the problem still exists, this solution shows the tracks of the Camera module supply voltages that needs to check before attempting to replace the camera module assembly. Nokia N78 keypad malfunction solution with keypad filter IC jumper ways solution 

Nokia 2710ne camera problem repair solution
There are three power supply voltages that makes the camera module works and operate if one of these voltage were missing the camera  will not function, and it shows camera hardware failure, camera on standby and either no reactions or indication at all.
A Camera on standby mode may fix by restoring its firmware. If an empty or black screen showed on the LCD display screen,  the problem may lies on the camera module itself, replacing it will possibly solve the problem. So first ensure that the firmware is secured before proceeding to hardware troubleshooting.
Read More..

Friday, October 24, 2014

Blackberry 8210 dead shot solution 100 tested solution

blackberry 8210 dead solution,blackberry 8210 not power on solution, blackberry 8210 shot not power on solution,blackberry full shot not power on solution ,blackberry 8210 not power solution, blackberry power switch not working solution 8210 blackberry power not working solution, blackberry dead solution 100% tested only change 1 diot solve problem , blackberry not working solution here,
blackberry 8100 Charging Ways 100% Tested solution 
blackberry shot not power on solution , blackberry 8210 power switch not working solution , blackberry shot solution,blackberry 8210 full shot 100% tested solution,blackberry dead solution,blackberry shot dead solution 100% tested here,
Read More..

Thursday, October 23, 2014

Blackberry 9105 cellular phone pearl sim card repair solution

blackberry 9105 cellular phone pearl sim card repair solution,blackberry 9105 cellular phone pearl sim card not working repair  solution,blackberry 9105 cellular phone pearl sim card not accept repair solution,blackberry 9105 cellular phone pearl sim card jumper ways repair solution ,blackberry 9105 cellular phone pearl sim card repair line not working guide solution,blackberry 9105 cellular phone pearl sim card line ok but not working repair 100% tested solution  solution , many time water damage phoen sim card not accent put sim but display shoy insert sim card if u have blackberry 9105 this problem phone i have this cellular phone 100% working solution see my solution i hope 100% solved your phone blackberry 9105 insert sim card again working see my solution ,and many blackberry update solution this blog i show 1 solution blackberry 8520 trackpaid fixed 100% tested solution here
this phone solution many time 100% working solution try this i hope solved your phone blackberry insert sim card again working.

Read More..

Blackberry 8310 Rf Full Ways Jumper Solution

blackberry 8310 rf solution 100% tested ,blackberry 8310 network solution,blackberry pf solution,blackberry 100% tested network solution ,blackberry 8310 rf not working solution ,blackberry 8310 rf not working only jumper done solution ,blackberry 8310 jumper solution ,blackberry 8310 rf not working only jumper done solution here if u need blackberry rf solution try this line i hope solve your problem,blackberry 8320 dead-short solution 100% tested solution
blackberry 8310 rf not working only jumper done solution ,blackberry 8310 network not working solution only jumper solution,blackberry 8310 rf jumper network not working solution 100% tested solution
Read More..

Blackberry 9900 bt warless not working solution

Blackberry 9900 bluetooth warless not working solution this problem many time bluetooth not working after bluetooth on but set display few time auto display white and hang not show display this problem think 100% bluetooth not working and your phone bluetooth ic damage ot working try my solution 100% working my solution many phone tested me this solution try this
Blackberry 9900 cellular phone battery connecter repair ways solution
see this diagram and see red link solution 1st try this all ic reheat i think solved your phone problem but not solve try 2nd step all red link ic re-boll and change this all ic 100% working again your phone bluetooth warless see and enjoy it

Read More..

BlackBerry 8520 sim ways solution 100 tested solution

blackberry 8520 insert sim solution,blackberry 8520 sim ways solution,blackberry 8520 sim line solution , blackberry 8520 without ic sim jumper solution
blackberry 8520 sim line damage solution blackberry 8520 insert sim card sim card not working solution without ic only jumper easy way 100% tested solution
see and enjoy it see my solution 100% working this solution many time tested solution see picture and jumper line solve your problem.many phone water damage sim not accept show only insert sim phone sim not accept i have this solution 100% tested
blackberry 8520 keypad not work 100% tested solution
if u need blackberry 8520 sim way 100% solution here only see this line step by step 
always done many phone me.
Read More..

Wednesday, October 22, 2014

Blackberry 9800 cellular phone sim ways solution

Blackberry 9800 cellular phone sim ways solution here 100% working solution this solution working many time blackberry 9800 sim card not accept solution sim card jumper solution sim card line damage only jumper done solution see this i hope only jumper step by step solved your phone sim card not accept solution
Blackberry 9800 Cellular Phone Keypad Not Working Repair Solution
see this line and try this solution only jumper step by step solved your blackberry 9800 insert sim solution many time tested this solution try this and dont forget visit my blog.
Read More..

Saturday, October 18, 2014

Nokia E63 Earpiece Speaker Solution


Nokia E63 Earpiece Speaker Solution Nokia E63 Earpiece Speaker problem Nokia E63 Earpiece Speaker Ways Nokia E63 Earpiece Speaker. If you are facing Earpice problem of Nokia E63 then you can solve it by this solution.
Read More..

Nokia 2330 Classic Hang problem solution

If you are facing hanging problem in Nokia 2330 Classic. or it got auto restart.this problem can be solve with a few steps that I am going to teach here.So keep reading and look at diagram bellow.Nokia Asha 303 Mic Not Working Problem Solution Jumpers

In above diagram you can see a jumper this jumper is used to solve hang problem in Nokia 2330 Classic. If Nokia 2330 Classic is hanging and got stuck no keyboard work and you have to shut it down.Applying this jumper will solve hanging problem.
for more detail and new tips and tricks about cellphone service problem keep visiting this page we will update cellphone service diagrams timely with new cellphone diagrams.some related post are also given bellow you can read them also for more information about cellphone.
Read More..

Friday, October 17, 2014

Sony Ericsson W380 Charging Problem


Sony Ericsson W380 Charging Problem
Sony Ericsson W380 Charging Ways
Sony Ericsson W380 Not Charging
Read More..

Nokia X2 05 Speaker problem solution jumper ways

Nokia X2-05 speaker problem, Nokia X2-05 earpiece jumper ways, Nokia X2-05 mic is not working, Nokia X2-05 speaker jumpers, speaker is not working or low voice and noise.Nokia X2-02 Lcd Display Jumper Ways Problem Solution

If Nokia X2-05 speaker has low voice or nosie it can be problem of speaker ear piece. If no voice in it that may can be cause of missing or damage parts. The noise can also be due to water damages in Nokia X2-05.
If speaker is not working or have a low voice it can be fault of speaker and housing. Check Nokia X2-05 housing ( body ). All housing have a small whole at the point of ear piece. In some cases rust or dust cover this point and the voice can not reach proper to the mic point so make it clean if there is some dust on it.
After disassambly of Nokia X2-05 look at the motherboard for rust carbon or burren parts. If you found some rust or carbon apply electronics cleaner on the mother board and apply hot air to make it dry proper.
Applying too much heat can damage the mother board and parts.It also can be harm for your skin.So keep in mind about normal heat flow when making it dry.
Check all these tracks that are provided in above diagram to solve speaker problem in Nokia X2-05. In diagram two different color lines are given to identify all parts that are used to solve Nokia X2-05 speaker problem with jumpers.
If some parts are missing or damage apply jumper on these points where small circles are pointing in nokia mic repairing diagram above.
Read More..

Nokia 6133 6126 Not Charging


Nokia 6133 / 6126 Not Charging,
Nokia 6133 / 6126 Charging Problem,
Nokia 6133 / 6126 Alien Battery,
Nokia 6133 / 6126 Charging Ways,
Nokia 6133 / 6126 Charging Solution
Nokia 6133 / 6126 Charging Tracks
Nokia 6133 / 6126 Charger Not Supported,
Read More..

Thursday, October 16, 2014

Nokia 6233 MMC Problem


Nokia 6233 MMC Problem,
Nokia 6233 Memory Card Problem,
Nokia 6233 MMC Corrupted,
Nokia 6233 Memory Card Corrupted,
Nokia 6233 MMC Jumpers,
Nokia 6233 MMC IC Ways Bypass,
Nokia 6233 Insert Memory Card,
Nokia 6233 No Memory Card,
Nokia 6233 Memory Card Not Working    ,
Nokia 6233 Memory Card Ways,
Nokia 6233 MMC Solution,
Nokia 6233 Memory Card Solution,
Nokia 6233
Read More..

Nokia X2 05 Keypad Not Working Problem Solution Jumper Ways

Nokia X2-05 keypad is not working, A few keys of Nokia X2-05 are not working, Keypad Hang and double values when press a single time. Or un proper keypad functions.nokia Asha 203 ight problem solution with jumpers

In all above cases and problem we can follow this post to solve Nokia X2-05 keypad problem in a few steps. If you press a single key and some other keys are also working it can be cause of water damages and rus, carbon. If you press keys and they do not reflect any process it can be problem of missing push button, missing components, burn parts.
After dis assembly of Nokia X2-05 look at the motherboard for rust carbon or burn parts. If you found some rust or carbon apply electronics cleaner on the mother board and apply hot air to make it dry proper.
Applying too much heat can damage the mother board and parts.It also can be harm for your skin.So keep in mind about normal heat flow when making it dry.
In above diagram you can see some different color lines all these different color inner and outer keys have same value according to the color schame. So if a single key is not working we can check its inner and outer value with meter and apply jumper from the other one which is working in normal condition.
If all keys are not working we can re sold and re flow Keypad IC. If replacement can not solve the keypad problem in Nokia X2-05 we have to replace it with new one.
In this diagram you can also see Nokia X2-05 On Off Power Button ways and jumpers.
Read More..

Wednesday, October 15, 2014

Sony Xperia Z1 Tips and Tricks

It is very important to know some tips on your device like Sony Xperia Z1. It will help you learn more about your device to make your life much easier in using it. Improving your productivity and fulfilling what you expected on your Sony Xperia Z1.

Here are some How Tos for your Sony Xperia Z1  These How Tos are still not yet complete and I am still working on the others:


How to Factory Reset Sony Xperia Z1

We have our own reasons why we factory reset our device. Maybe we want to delete all the files and restore the device to its original state. It could also be the device may be malfunctioning or so slow and it needs to be reset.

Restoring the default settings or factory reset your Sony Xperia Z1 will delete all your files. It is recommended to backup your important files on your computer before attempting to reset your device.

There are two ways on how to reset your Sony Xperia Z1. One is to erase everything, wiping your files and restoring the default settings. The other one is to reset the device without deleting your personal data.

How To Reset Your Sony Xperia Z1 (Erasing All Your Files):

  • On your Home Lcd, tap Apps. 
  • Go to Settings, and select Backup & reset.
  • Tap on Factory data reset.
  • Then Reset phone. 
  • Confirm by tapping Erase everything. You just need to wait while your phone deleting your files and restoring your settings to default.

How To Reset Without Erasing Your Personal Data:

  • On your Home Lcd, tap Apps. 
  • Go to Settings, and select Backup & reset.
  • Tap on Settings reset.
  • Then Reset phone. 
  • Confirm by tapping Reset settings. 
  • Wait while your phone restoring your settings.

How to Set Up Voicemail Service on Sony Xperia Z1

Voicemail services depends on your subscription plan with your service provider. This feature allows caller to leave voice messages on your phone whenever you cant pick up. Your voicemail number may be found on your sim card or you can get it directly from your service provider. Here are the steps to set up voicemail service on Sony Xperia Z1.

To set up your voicemail number:

1. On your devices homeLcd, tap on Menu icon
 to enter your voicemail number.

2. Go to Settings menu.

3. Select Call Settings and choose Voicemail Settings.

4. Tap on Voicemail number so you can enter your designated voicemail service number.

5. And lastly tap on OK.

To call your voicemail service number:

1. On your homeLcd, tap on the Menu icon .

2.Look for Phone and tap it.

3. And touch and hold for seconds the number 1.


How to Save Battery on Sony Xperia Z1

Battery Life depends on how you use your device. For your Sony Xperia Z1 device, if you want to save your battery to last longer hours, you may need to adjust your settings. Follow these suggestions:

• Turn on the power-saving option on the device. Then lessen the Lcd brightness and the Lcd lock timeout. On the HomeLcd, tap on Menu icon. Select Settings > Power management.

- Use the Stamina mode and Low battery mode features.
- To activate the STAMINA mode: While you are in the Power management, tap on Point icon next to STAMINA mode, then tap Activate.

• Turn down your device volume with the volume keys.

• Close any apps or features when you are done using it so they will not continuously running in the background.

• Turn off the network connection if you are out of range so that your device will stop searching for a network signal. To turn off the network go to Settings and turn off the Bluetooth and Wi-Fi.

• You should use the latest version of the software update. Software updates improves some features and fixes some bugs on the previous software version.

• Adjust your brightness level to low.

• Turn off the camera flash.

• If you have any live wallpaper, Disable it.

• Set the synchronization application to manual. You can also choose the automatic, but increase the synchronization intervals.

• If you want to listen to music, use the Sony original hands free device. It demand less battery power than your devices own loudspeakers.


How to Start the Smart Connect Application on Sony Xperia Z1

Wouldnt it be nice if youre phone automatically plays your song list right when you step in your car? Or what about letting you show your whole day agenda the moment you arrive at your work table between 8-9am? These are just examples on how Sony Xperia Z1s Smart Connect app works. With this app, you can set an event to happen on your device at certain times or what will happen when you connect/disconnect accessories like headset or charger. Hereshow to use it.

1. On your devices home Lcd, tap on Menu icon

2. Look for Smart Connect and tap on it.

3. If its your first time opening the said app, tap on OK to close the introduction Lcd.

4. Go to Events tab and tap on the plus (+) icon.

5. Type in a name for the event and tap on Create.

6. Under When, add either an accessory ( like what happens on your device when you connect your headset) or a time interval or could be both.

7. Under Do This, add what you want to happen on your device.

8. Under At the End, add what you want to happen to your device when you disconnect your accessory or when the time interval ends.

9. Press on Back Arrow to save the event.


How to Transfer Files Using Media Transfer Mode Via Wi-Fi on Sony Xperia Z1

Transferring files in Sony Xperia Z1 is now made easy by using the Media Transfer Mode. You can easily transfer files between your device and other MTP compatible devices such as computer, using a Wi-Fi connection. But before you can transfer files wirelessly, you will need to pair both devices.

Note: You will need a Wi-Fi enabled devices that supports Media transfer such as a computer running Microsoft, Windows Vista orWindows 7.

To pair your device with the computer:

  • Check if the media transfer mode of your device is enabled. It is normally enabled by default.
  • Using the USB cable, connect your device to a computer.
  • On your computer, once the name of your device appear, click on Network Configuration and just follow the steps on how to pair the computer.
  • After pairing, safely disconnect your device from your computer.

These steps will work only on Windows 7 OS and the computer is connected to the Wi-Fi Access point via network cable.

To connect paired devices wirelessly in Media Transfer Mode:

  • First things first, check if the media transfer mode is enabled.
  • On your Home Lcd, tap on the Menu icon.
  • Select Settings > Xperia > USB connectivity.
  • Then tap the paired device that you want to connect to under Trusted devices.
  • Tap connect.

If you want to disconnect, just tap on the paired device and tap Disconnect.

If you want to remove the paired device, tap on the paired device you want to remove and select Forget.


How to Add a Shortcut on Sony Xperia Z1 HomeLcd

Just like a desktop, it also works best on any smartphones to add a shortcut on a homeLcd. This r somehow makes navigation, especially to important files/apps, more accessible. Its less hassle and less tapping. Sony Xperia Z1 definitely allows you to make your device experience stress-free by adding a shortcut to important apps on your homeLcd. Heres how to do it.

1. On your devices homeLcd, touch and hold and empty area until the device vibrates.

2. After doing so, tap on Apps.

3. Then go to Shortcuts and select a shortcut.

4. Or another option, just go directly to the Application Lcd and touch and hold the application.


How to Add and Resize Widgets on Sony Xperia Z1

Adding Widgets on your HomeLcd will help you improve your productivity in using your Sony Xperia Z1. If you dont know what widgets means, Widgets are small applications that you can directly use on your HomeLcd. These will serve as your shortcut icon so will no longer need to access your Menu.

Follow these steps on how to add widgets on your HomeLcd.
  • Tap and hold an empty area on your Home Lcd until your device vibrates.
  • There should an option appear, tap on Widgets.
  • Select the widget and tap on it you want to add.
  • There are some widgets that are resizeable, you can expand them to view the content more on your HomeLcd.

How to resize a Widget:
  • Tap and hold the widget you want to resize until it magnifies and the device vibrates. You can tell if the widget is resizeable if the highlighted frame and resizing dots appear.
  • You just need to Drag the dots for your preferred size.
  • Then tap anywhere on the HomeLcd to confirm the new size of the widget.

How to Change Time & Date on Sony Xperia Z1

In some devices you can only change the Timezone and not the specific time and date. But in Sony Xperia Z1, you have an option whether to set the time in automatic or to manually set the time.

Follow these steps on how to change the time and date on your device:

To manually set the date:

  • On your Home Lcd, tap the Menu icon.
  • Select Settings, then tap Date & Time.
  • You need to uncheck the Automatic date & time. If it is set to automatic.
  • Then tap on Set date, and adjust the date by scrolling up and down.
  • To confirm the changes, tap Done.

To manually set the time:

  • On your Home Lcd, tap the Menu icon.
  • Select Settings, then tap Date & Time.
  • You need to uncheck the Automatic date & time. If it is set to automatic.
  • Then tap on Set time, and adjust the time by scrolling up and down.
  • To confirm the changes, tap Done.

If you want to change the timezone:

  • On your Home Lcd, tap the Menu icon.
  • Select Settings, then tap Date & Time.
  • You need to uncheck the Automatic date & time. If it is set to automatic.
  • Then tap on Select time zone.
  • Find your preferred time zone in the option.

How to Link Duplicate Contacts on Sony Xperia Z1

Duplicate contacts usually happens when you import your old contacts to your new device or when you synchronize your contacts with the other account. On your Sony Xperia Z1, you can avoid dupicate contacts and instead link these two to create a single entry. If you happen to link two contacts by mistake, you can separate them again. Heres how you can link two contacts.

1.  On your devices homeLcd, tap on.

2. Tap on and tap the contact you want to link with another contact.

3. Press on and tap Link contact.

4. And tap the contact whose information you want to be linked with the first one. Tap OK to confirm. The first contact no longer appears on your contact list but is merged with the second contact.


Now if you mistakenly linked two contacts

1.  Tap on on your homeLcd and then tap on.

2. Then tap on the linked contact you want to edit.

3. And tap on. Tap on Unlink contact on the list and tap on OK to confirm.


How to Transfer Contacts from Sim Card or Memory Card to Sony Xperia Z1

Contacts is very important for everyone of us. We cant connect to our friends without a contact number. If you have a new phone, saving contacts on the phone one by one is so hassle. But if you have save your contacts on a Sim Card or Memory Card, then you can transfer your contacts from your SIM Card or Memory Card to your Sony Xperia Z1.

How to transfer contacts from a SIM card to your Xperia Z1:
  • On your devices homeLcd, tap on the Menu icon .
  • Then tap on the Person icon or Contacts.
  • Press the Three Vertical Dots, and select Import contacts > SIM card.
  • If you have set up a synchronization account, then you can choose to add the SIM card contacts under that account. Or you may choose to only use the contacts on your device.
  • If you want to import all the contacts, tap Import all
  • If you want to select which contact to transfer, you just need to find and tap on the contact.


How to transfer contacts from a memory card to your Xperia Z1:

  • On your devices homeLcd, tap on the Menu icon .
  • Then tap on the Person icon or Contacts.
  • Press the Three Vertical Dots, and select Import contacts > SD card.
  • Choose the option you preferred if you have set up a synchronization account. Whether to add the imported contacts under that account or on your device.
  • If you have more than one vCard file on the SD card, there should be a list appear on the different batches of contacts. Just select the batch you want to import.


How to Import Contacts From Old Phone to New Phone (on Sony, iPhone, Samsung, HTC and Nokia)

Contacts is very important for everyone of us. We cant connect to our friends without a contact number. If you have a new phone, saving contacts on the phone one by one is so hassle. But now, theres an easy way how to transfer or import your contacts from your old phone to your new phone.

Use your PC to transfer contacts to your new phone. This process is applicable in several phone brands, including iPhone, Samsung, HTC and Nokia.

You just need an Internet Connection on your PC, your old and new phone and their own USB cable.

Then you need to install the PC Companion program. This is a free application and the installation files are already saved on your new phone. This program can also be used in updating your phone software.

Please note that if you are using the Microsoft Windows 7 operating system on your PC, make sure that the AutoPlay setting is enabled.

To check your settings:

Click Start > Control Panel, then type "autoplay" on the search box. Click the AutoPlay, and mark the check box Use AutoPlay for all media and devices.

Installing the PC Companion:

  • Turn on your new Phone and connect it to your PC.
  • On your new Phone, tap "Install" to install PC Companion on the PC.
  • On your computer, if a pop-up window that appears notifies you about available PC Software, select Run Startme.exe.
  • Then click Install to start the installation and then follow the instructions to complete the installation.

If you are not prompted with a pop-up window to install the PC Companion, you can also download the PC Companion here.

Transferring your contacts to your new phone:

  • Make sure that PC Companion is installed on your PC.
  • Open the PC Companion application on your PC.
  • Then click Contacts Setup and follow the instructions to transfer your contacts.


How to Screen Mirror Sony Xperia Z1 to Show the Screen on a TV

The Screen Mirroring will allow you to show the Lcd of your device on a TV or other large display without using a cable connections. It uses the Wi-Fi Direct technology that create a wireless connection between two devices. You can also use this feature to listen to music from your phone via the TVs speakers.

How to mirror the Lcd of your phone on a TV:

1. First you need to turn on the Lcd mirroring function on your TV. Just follow the instructions in the User Guide of your TV.

2. From your Home Lcd, tap on the Menu icon 

3. Select on Settings, and tap Xperia™.

4. Choose Screen mirroring.

5. Tap to turn on the Screen mirroring and select a device.

Note: The TV that you want to connect with must support Lcd mirroring for the above described functionality to work. If it does not support, then you can try the Throw feature. Go to Settings Throw feature.


How to Activate Camera App and Play Tracks on a LockLcd on Sony Xperia Z1

LockLcds dont normally allow users to launch any apps or even take photos. We still need to unlock our Lcds to use certain apps on our handset. But with Sony Xperia Z1, you can take photos, record videos and play tracks without unlocking the Lcd. Heres how you can enjoy this feature on your Sony Xperia Z1.

To take a photo on a lockLcd

1. Activate first your Lcd by briefly pressing the power key

2. Now activ  the camera appby dragging the camera icon to the left across the Lcd.

3. And tapto take photos or record videos without unlocking your Lcd.


To play an audio on a lockLcd

1. Activate first your Lcd by briefly pressing the power key.

2. Now to display the music player controls, dragto the right across the Lcd.

3. And tapto play a track on a lockLcd.


To pause an audio track from the lockLcd

1.  Activate first your Lcd by briefly pressing the power key.

2. When the music player controls appear, tapto pause the track.


To change the currently playing audio track on a lockLcd

1.  Activate first your Lcd by briefly pressing the power key.

2.  Then taporwhen the music player controls appear.


How to Share Contacts Using NFC on Sony Xperia Z1

NFC feature is a must-have for any smartphones these days.  Near-field communication or NFC works similarly like bluetooth. By touching your NFC-enabled phones against each other, you can then share contacts, music and photos. Well, heres how you can easily share contacts on Sony Xperia Z1 uisng NFC feature.

1. On your device, enable content sharing in Settings.

2. Then go to Wireless and Networks.

3 And choose on More menu.

When the phone vibrates, tap the onLcd message that says "touch to beam".


How to Turn on Mobile Bravia Engine on Sony Xperia Z1

Mobile Bravia Engine is a pre-installed technology on Sony Xperia Z1 which allows you to view photos and videos in a clearer, sharper and more natural way. This technology might consume more battery but its worth it when you use it to view images in a nicer way. Heres how you can turn on Mobile Bravia Engine on Sony Xperia Z1.

1. On your devices homeLcd, tap.

2. Then find and tap Settings.

3. Go to Display.

4. And mark the Mobile BRAVIA Engine 2 checkbox if its not marked.

Now youre ready to view those captured moments in a clearer, sharper and more natural way.


How to Add a Geotag on a Photo on Sony Xperia Z1

Adding a location to those photos somehow adds relevance and it gives you that flashback of memories when you view those nicely captured moments. Well, this feature is not new any longer since its been there online and you often use them on photo-filtered websites. But with Sony Xperia Z1, you can now add geotags on your photos right on your handset. Heres how you can add geotag on your photos.

1.  Open your photo gallery on your device.

2.  When youre viewing a photo, just tap the Lcd and the toolbars will display.

3. Now tapto open the map Lcd.

4. Find and tap the desired location to put the map on the photo.

5. To adjust the location of the photo, just tap the location on the map to where you want to move the photo.

6. Tap OK when youre done and to save the geotag. You can then return to the photo viewer Lcd.


How to Hard Reset Sony Xperia Z1 Using Buttons

We have our own reasons why we hard reset our device. Maybe we want to delete all the files and restore the device to its original state. It could also be the device may be malfunctioning or so slow and it needs to be reset.

Restoring the default settings or factory reset your Sony Xperia Z1 will delete all your existing files. It is recommended to backup your important files on your computer before attempting to reset your device.

1. If your phone is turned off, just press and hold the Volume Up and Volume Down buttons.

2. Then press and release the Power button (just keep on holding the volume buttons). There should a menu will appear on your phone.

3. Press the Volume down button to navigate to the Recovery option. Press the Volume Up to select (if that doesnt work, use the Power button to select).

4. An Android logo will appear. Press the Volume Down and Volume Up button together and a recovery menu should appear. Use the Volume buttons to move to the Wipe data/Factory reset option and then press Power to select.

5. Use the Volume Down key to choose Yes and press the Power button again to select.
Read More..